Configuring your Site in Filezilla
(Mengkonfigurasi Laman Anda di Filezilla)
To configure your site in Filezilla, first you need to open the application and then follow this guide
(Untuk mengkonfigurasi laman anda di Filezilla, pertama anda perlu membuka aplikasi dan kemudian ikuti panduan ini).
(Untuk mengkonfigurasi laman anda di Filezilla, pertama anda perlu membuka aplikasi dan kemudian ikuti panduan ini).
- Click on the 'Site Manager'icon on the toolbar (Klik pada ikon 'Pengurus Tapak' pada toolbar).
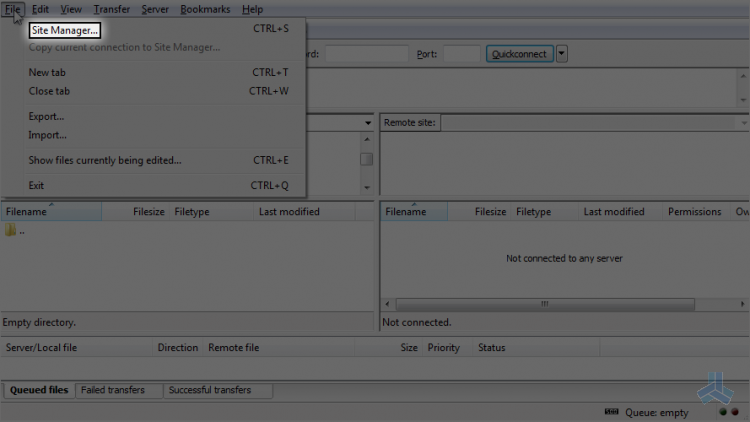
Note/Nota: This is usually the first icon on the left (Kebiasaannya ikon pertama berada di bahagian kiri).
- To create a folder for your new site, click on 'New Folder'and enter a name for the folder (Untuk membuat fail untuk tapak baru anda, klik pada 'Fail Baru' dan masukkan nama untuk fail tersebut).
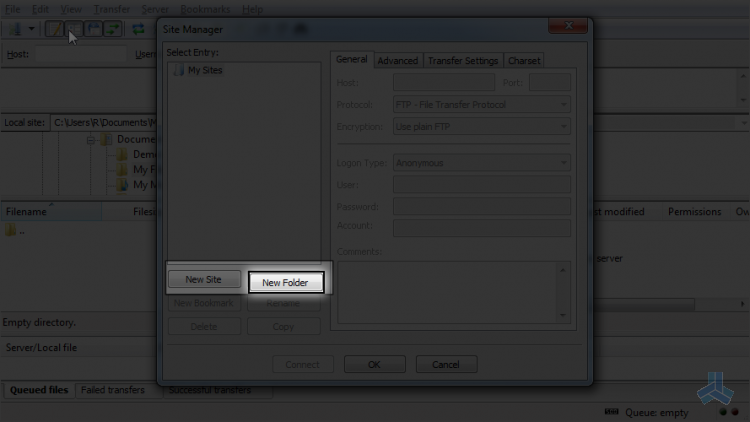
- To create a new site to go into the folder, click 'New Site'and give the site a name Untuk membuat tapak baru untuk dimasukkan ke dalam fail, klik 'Tapak Baru' dan beri nama laman web tersebut).
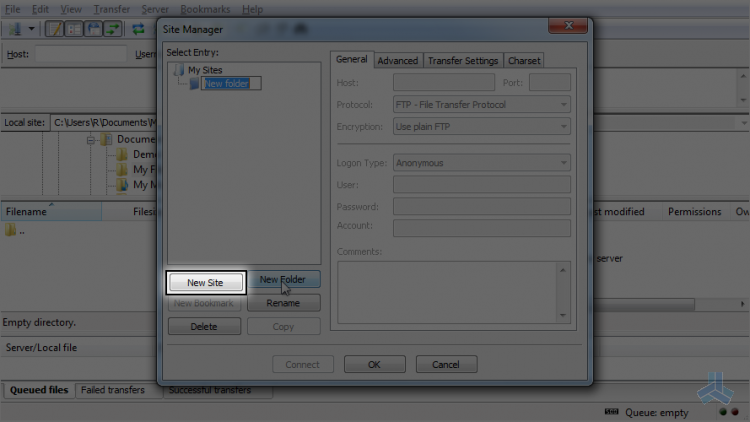
Note/Nota: As this is for your reference only you can use any format you like (Oleh kerana ini hanya untuk rujukan anda, anda boleh menggunakan sebarang format yang anda suka).
- In the 'Host' field, enter the IP address for your site (Pada bahagian 'Host', masukkan alamat IP untuk tapak anda).
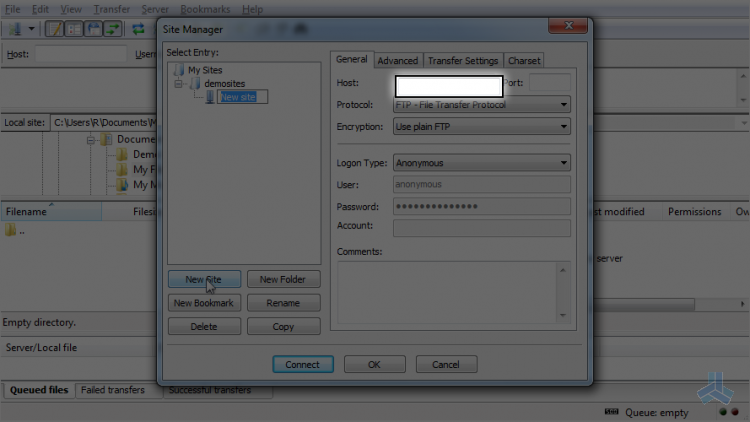
Note/Nota: This will either be ftp.yourdomain.com or the IP address supplied by your web host to use until your site DNS has fully propagated (Sama ada ftp.yourdomain.com atau alamat IP yang dibekalkan oleh hos web anda untuk digunakan sehingga DNS tapak anda telah boleh digunakan sepenuhnya).
- In the 'Logon Type' dropdown, select 'Normal' (Dalam dropdown 'Logon Type', pilih 'Normal').
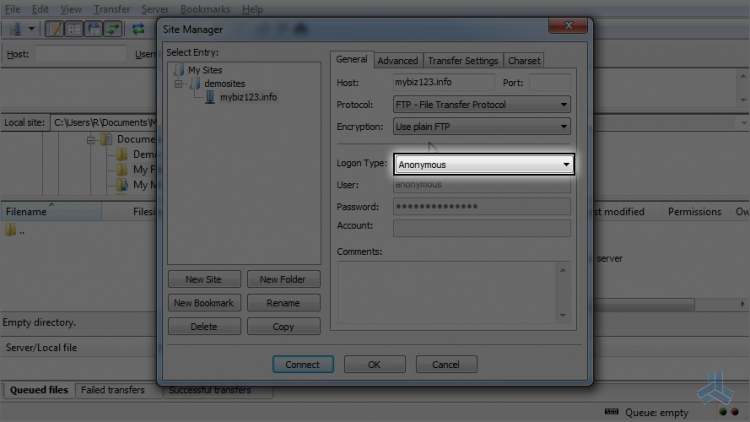
- Enter the username and password provided to you by your web host in the 'User'and 'Password' fields (Masukkan nama pengguna dan kata laluan yang diberikan kepada anda oleh hos web anda pada bahagian 'User' dan 'Password').
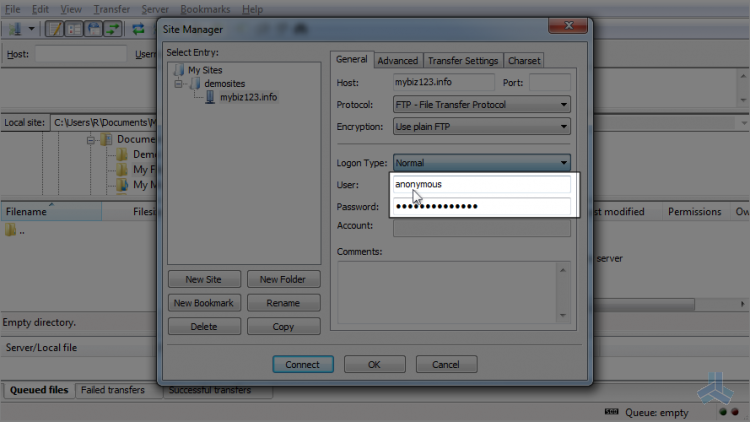
Note/Nota: We recommend that you use the default settings for the other fields (Kami mengesyorkan agar anda menggunakan tetapan default pada bahagian lain).
- Click 'OK' to save the new site or 'Connect' to go to your new site on the server (Klik 'OK' untuk menyimpan tapak baru atau 'Sambung' untuk pergi ke tapak baru anda di server).
- To modify your site click the 'Site Manager'icon and make the changes, remember to click 'OK' to save them (Untuk mengubah suai tapak anda, klik ikon 'Mengurus Tapak' dan buat perubahan, klik 'OK' untuk menyimpannya).
-
To delete a site, highlight the site in Site Manager and click 'Delete' (Untuk memadam tapak, highlight tapak di Pengurus Laman dan klik 'Padam').